Axis2接口的使用
1、将bin包和war包解压,

2、将里面的axis2.war解压
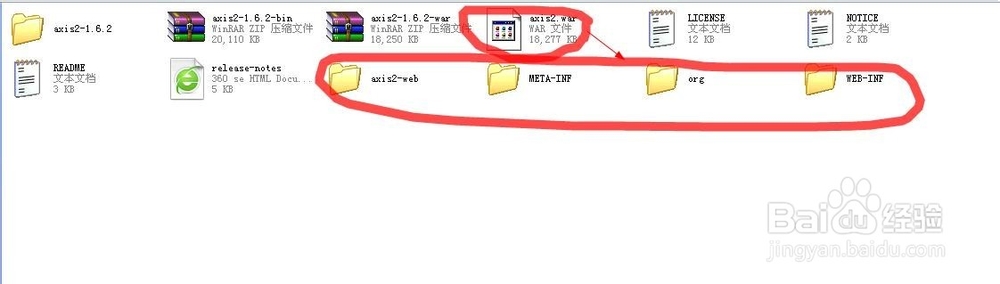
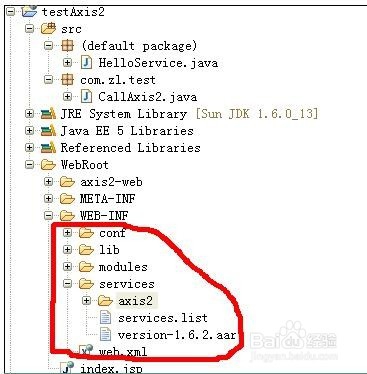
3、用MyEclipse新建Java WEB项目testAxis2,将axis2.war解压出来的WEB-INF里面除了class文件夹外的所有文件拷贝到新建的项目的WEB-INF下

4、接下来开始写Webservice服务端。
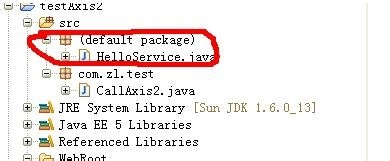
在项目src下右击新建类,类名叫HelloService,放在默认包下,类里面有两个放法:sayHello()、sayHelloToName(String name);
5、代码如下:

6、在项目的WEB-INF/services/axis2/META-INF/services.xml里配置接口的类,信息如下:
<?xml version="1.0" encoding="UTF-8"?>
<serviceGroup>
<service name="HelloService">
<parameter name = "ServiceClass">趣贪HelloService</parameter>
<parameter name="load-on-startup">true</parameter>
<messageReceivers>
<messageReceiver mep="http://www.w3.org/2004/08/wsdl/in-only"
class="org.apache.axis2.rpc.receivers.RPCInOnlyMessageReceiver" />
<messageReceiver mep="http://www.w3.org/2004/08/wsdl/in-out"
class="org.apache.axis2.rpc.receivers.RPCMessageReceiver" />
</messageReceivers>
</service>
</serviceGroup>
解释:<service name="HelloService">中,HelloService是服务的类名,可以随便起,这里就个项眠菌目里的类名保持一致了;
<parameter name = "ServiceClass">HelloService</parameter>中,HelloService就是想目中的类名。
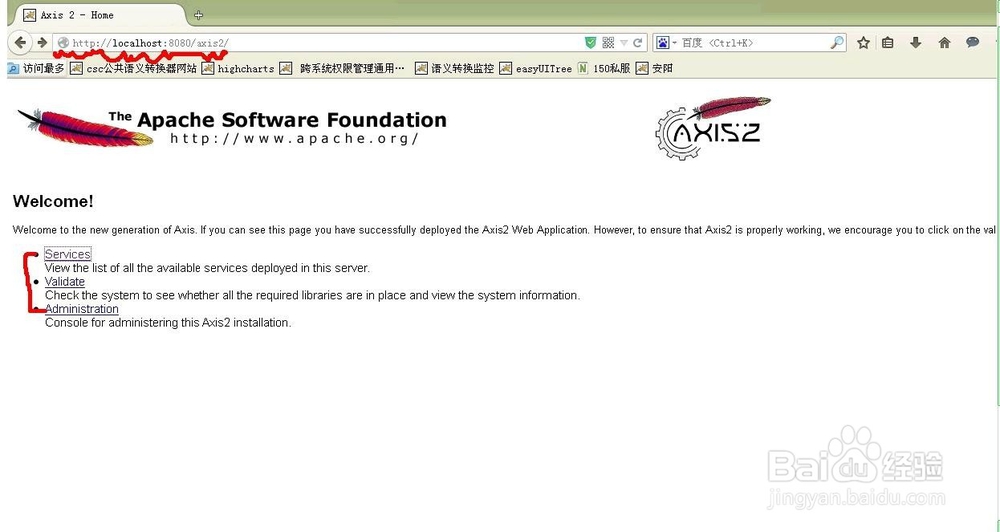
7、将axis2.war文件拷贝到tomcat的webapps下,运行tomcat,在浏览器里输入:http://localhost:8080/axis2,将会出现下图,说明Axis2搭建成功了。
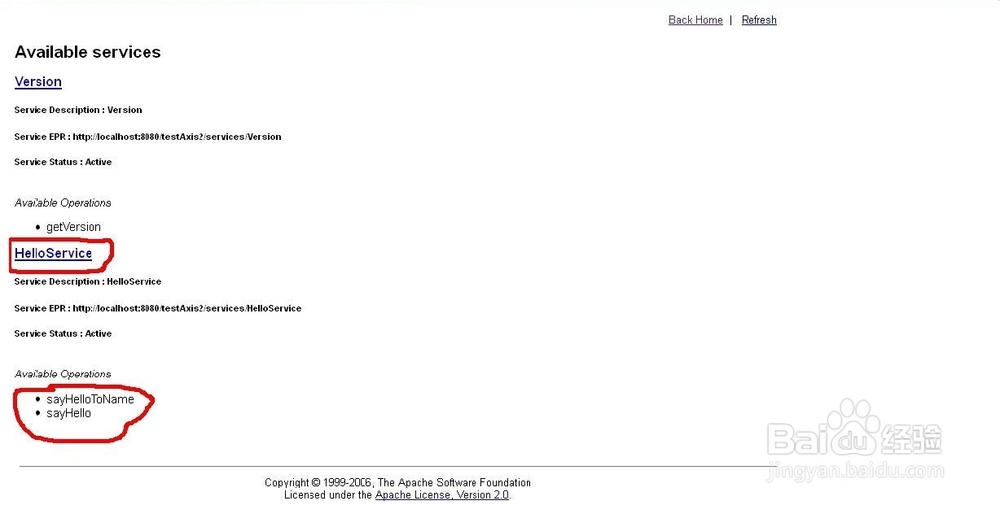
8、将刚才自己建的WEB项目发布到相同的tomcat里。(如果上面的tomcat每关闭要先关闭)启动tomcat。在浏览器里输入地址:http://localhost:8080/testAxis2/axis2-web/index.jsp,回车,点击Services,可以看到自己写的服务HelloService和服务的方法sayHello、sayHelloToName,如图下图,至此说明Webservice服务接口发布成功,接下来就是调用接口。
9、在项目泰距码里新建一个测试类,代码如下:
package com.zl.test;
import javax.xml.namespace.QName;
import org.apache.axis2.addressing.EndpointReference;
import org.apache.axis2.rpc.client.RPCServiceClient;
public class CallAxis2 {
@SuppressWarnings("unchecked")
public static void main(String[] args) {
try {
//调用webservice
RPCServiceClient serviceClient = new RPCServiceClient();
org.apache.axis2.client.Options options = serviceClient.getOptions();
EndpointReference targetEPR = new EndpointReference(
"http://192.168.99.152:8080/testAxis2/services/HelloService");//接口地址
options.setTo(targetEPR);
QName opGetWeather = new QName("http://ws.apache.org/axis2", "sayHelloToName");//命名空间、接口方法
String str="美女";
Object[] opGetWeatherArgs = new Object[] {str};//请求文
Class[] returnTypes = new Class[] { String.class };
Object[] response = serviceClient.invokeBlocking(opGetWeather,opGetWeatherArgs, returnTypes);
String result = (String) response[0];//返回结果
System.out.println(result);
} catch (Exception e) {
e.printStackTrace();
}
}
}
运行后控制台会输出:hello 美女。说明接口调用成功。