30分钟助你快速掌握Smarty PHP教程
1、 在smarty的模板设计部分我简单的把smarty在模板中的一些常用设置做了简单的介绍,这一节主要来介绍一下如何在smarty中开始我们程序设计。下载Smarty文件放到你们站点中。
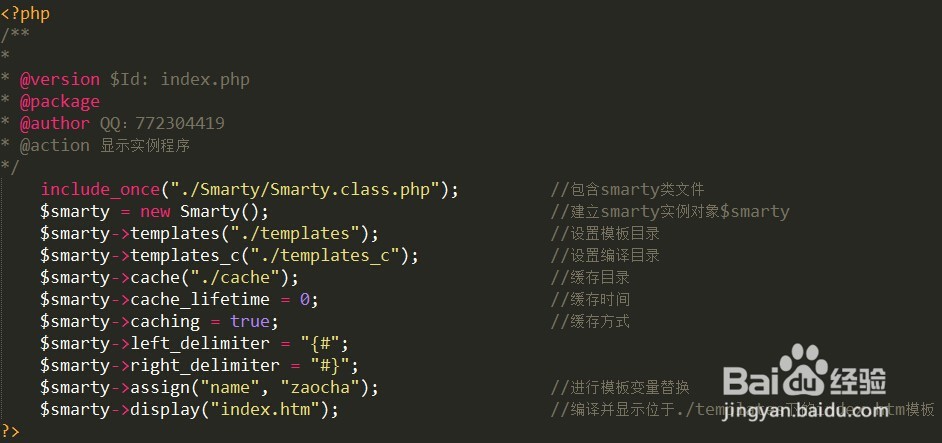
index.php代码如下:
<?php /** * * @version $Id: index.php * @package * @author www.jb51.net * @action 显示实例程序 */ include_once("./Smarty/Smarty.class.php"); //包含smarty类文件
$smarty = new Smarty(); //建立smarty实例对象$smarty $smarty->templates("./templates"); //设置模板目录 $smarty->templates_c("./templates_c"); //设置编译目录 $smarty->cache("./cache"); //缓存目录 $smarty->cache_lifetime = 0; //缓存时间 $smarty->caching = true; //缓存方式
$smarty->left_delimiter = "{#"; $smarty->right_delimiter = "#}"; $smarty->assign("name", "zaocha"); //进行模板变量替换 $smarty->display("index.htm"); //编译并显示位于./templates下的index.htm模板 ?>

2、 我们可以看到,smarty的程序部分实际就是符合php语言规范的一组代码,我们依次来解释一下:
1:/**/语句;
包含的部分为程序篇头注释。主要的内容应该为对程序的作用,版权与作者及编写时间做一个简单的介绍,这在smarty中不是必需的,但从程序的风格来讲,这是一个好的风格。
2:include_once语句;
它将安装到网站的smarty文件包含到当前文件中,注意包含的路径一定要写正确。
3:$smarty = new Smarty();
这一句新建一个Smarty对象$smarty,简单的一个对象的实例化。
4:$smarty->templates("");
这一句指明$smarty对象使用tpl模板时的路径,它是一个目录,在没有这一句时,Smarty默认的模板路径为当前目录的templates目录,实际在写程序时,我们要将这一句写明,这也是一种好的程序风格。
5:$smarty->templates_c("");
这一句指明$smarty对象进行编译时的目录。在模板设计篇我们已经知道Smarty是一种编译型模板语言,而这个目录,就是它编译模板的目录,要注意,如果站点位于linux服务器上,请确保teamplates_c里定义的这个目录具有可写可读权限,默认情况下它的编译目录是当前目录下的templates_c,出于同样的理由我们将其明确的写出来。
6:$smarty->left_delimiter与$smarty->right_delimiter;
指明在查找模板变量时的左右分割符。默认情况下为"{"与"}",但在实际中因为我们要在模板中使用<script>,Script中的函数定义难免会使用{},虽然它有自己的解决办法,但习惯上我们将它重新定义为"{#"与"#}"或是"<!--{"与"}-->"或其它标志符,注意,如果在这里定义了左右分割符后,在模板文件中相应的要使每一个变量使用与定义相同的符号,例如在这里指定为"<{"与"}>",htm模板中也要相应的将{$name}变成<{$name}>,这样程序才可以正确的找到模板变量。
7:$smarty->cache("./cache");
告诉Smarty输出的模板文件缓存的位置。上一篇我们知道Smarty最大的优点在于它可以缓存,这里就是设置缓存的目录。默认情况下为当前目录下的cache目录,与templates_c目录相当,在linux系统中我们要确保它的可读可写性。
8:$smarty->cache_lifetime = 60 * 60 * 24;
这里将以秒为单位进行计算缓存有效的时间。第一次缓存时间到期时当Smarty的caching变量设置为true时缓存将被重建。当它的取值为-1时表示建立起的缓存从不过期,为0时表示在程序每次执行时缓存总是被重新建立。上面的设置表示将cache_lifetime设置为一天。
9:$smarty->caching = 1;
这个属性告诉Smarty是否要进行缓存以及缓存的方式。它可以取3个值,0:Smarty默认值,表示不对模板进行缓存;1:表示Smarty将使用当前定义的cache_lifetime来决定是否结束cache;:2:表示Smarty将使用在cache被建立时使用cache_lifetime这个值。习惯上使用true与false来表示是否进行缓存。
10:$smarty->assign("name", "zaocha");
该数的原型为assign(string varname, mixed var),varname为模板中使用的模板变量,var指出要将模板变量替换的变量名;其第二种原形为assign(mixed var),我们要在后面的例子详细的讲解这个成员函数的使用方法,assign是Smarty的核心函数之一,所有对模板变量的替换都要使用它。
11:$smarty->display("index.tpl");
该函数原形为display(string varname),作用为显示一个模板。简单的讲,它将分析处理过的模板显示出来,这里的模板文件不用加路径,只要使用一个文件名就可以了,它路径我们已经在$smarty->templates(string path)中定义过了。
程序执行完后我们可以打开当前目录下的templates_c与cache目录,就会发现在下边多出一些%%的目录,这些目录就是Smarty的编译与缓存目录,它由程序自动生成,不要直接对这些生成的文件进行修改。
以上我简单的把Smarty程序中的一些常用的基本元素介绍了一下,在后边的例子中你可以看到将它们将被多次的使用。
3、接下来介绍一个section循环块与foreach循环块,本来它应该属于模板部分,但是由于它们是smarty的精华所在,而且与smarty程序设计部分联系非常紧密,所以就在本节单独拿出来讲一下。
foreach:用于循环简单数组,它是一个选择性的section循环,它的定义格式为:
{foreach from=$array item=array_id} {foreachelse} {/foreach}
其中,from 指出要循环的数组变量,item为要循环的变量名称,循环次数由from所指定的数组变量的个数所决定。{foreachelse}用来当程序中传递过来的数组为空时的处理。

4、下面是一个简单的例子:
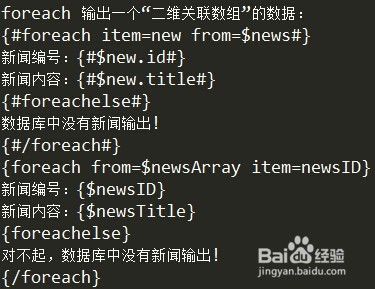
模板文件example.htm页面如下:
foreach 输出一个“二维关联数组”的数据:
{#foreach item=new from=$news#}
新闻编号:{#$new.id#}
新闻内容:{#$new.title#}
{#foreachelse#}数据库中没有新闻输出!
{#/foreach#}
{foreach from=$newsArray item=newsID}新闻编号:{$newsID}新闻内容:{$newsTitle}{foreachelse}对不起,数据库中没有新闻输出!
{/foreach}
5、这是一个错误的不显示数据,本文做了更正。
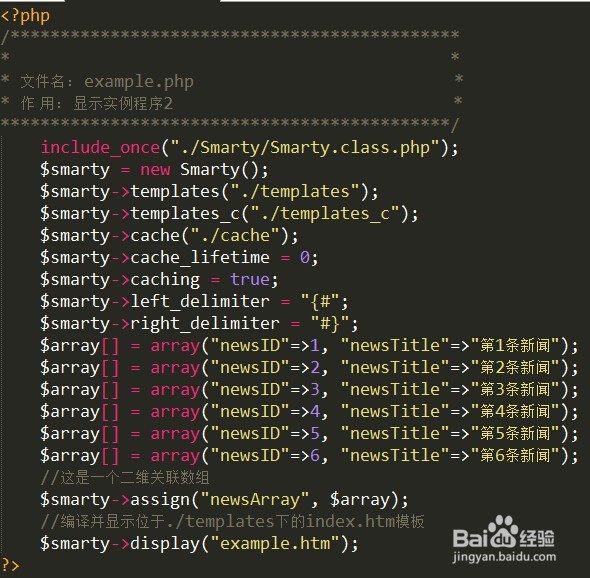
程序文件:example.php如下:
<?php/********************************************* * * 文件名: example.php * 作 用: 显示实例程序2 *********************************************/ include_once("./Smarty/Smarty.class.php"); $smarty = new Smarty(); $smarty->templates("./templates"); $smarty->templates_c("./templates_c"); $smarty->cache("./cache"); $smarty->cache_lifetime = 0; $smarty->caching = true; $smarty->left_delimiter = "{#"; $smarty->right_delimiter = "#}"; $array[] = array("newsID"=>1, "newsTitle"=>"第1条新闻"); $array[] = array("newsID"=>2, "newsTitle"=>"第2条新闻"); $array[] = array("newsID"=>3, "newsTitle"=>"第3条新闻"); $array[] = array("newsID"=>4, "newsTitle"=>"第4条新闻"); $array[] = array("newsID"=>5, "newsTitle"=>"第5条新闻"); $array[] = array("newsID"=>6, "newsTitle"=>"第6条新闻"); //这是一个二维关联数组 $smarty->assign("newsArray", $array); //编译并显示位于./templates下的index.htm模板 $smarty->display("example.htm"); ?>
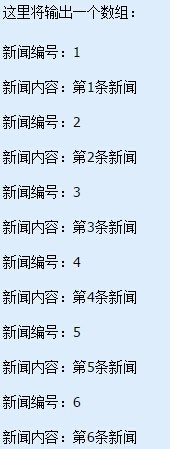
6、输入结果:example.php输出如下:
这里将输出一个数组:
新闻编号:1
新闻内容:第1条新闻
新闻编号:2
新闻内容:第2条新闻
新闻编号:3
新闻内容:第3条新闻
新闻编号:4
新闻内容:第4条新闻
新闻编号:5
新闻内容:第5条新闻
新闻编号:6
新闻内容:第6条新闻
foreach还可以用foreachelse来匹配,用foreachelse来表示当传递给foreach的数组为空值时程序要执行的操作,具体的使用方法,请参考手册的说明。
7、section的产生是为解决foreach的不足的,与foreach一样,它用于设计模板内的循环块,它较为复杂,可极大程序上满足程序需要,所以在程序中我习惯使用它而不使用foreach,基本原形为:
{section name = name loop = $varName[, start = $start, step = $step, max = $max, show = true]}
参数解释如下:
name: section的名称,不用加$
$loop: 要循环的变量,在程序中要使用assign对这个变量进行操作。
$start: 开始循环的下标,循环下标默认由0开始
$step: 每次循环时下标的增数
$max: 最大循环下标
$show: boolean类型,决定是否对这个块进行显示,默认为true这里有个名词需要说明:
循环下标:实际它的英文名称为index,是索引的意思,这里我将它译成"下标",主要是为了好理解。它表示在显示这个循环块时当前的循环索引,默认从0开始,受$start的影响,如果将$start设为5,它也将从5开始计数,在模板设计部分我们使用过它,这是当前{section}的一个属性,调用方式为Smarty.section.sectionName.index,这里的sectionName指的是函数原型中的name属性。
{section}块具有的属性值,分别为:
1. index: 上边我们介绍的"循环下标",默认为0
2. index_prev: 当前下标的前一个值,默认为-1
3. index_next: 当前下标的下一个值,默认为1
4. first: 是否为第一下循环
5. last: 是否为最后一个循环
6. iteration: 循环次数
7. rownum: 当前的行号,iteration的另一个别名
8. loop: 最后一个循环号,可用在section块后统计section的循环次数
9. total: 循环次数,可用在section块后统计循环次数
10. show: 在函数的声明中有它,用于判断section是否显示
它们的具体属性大家可以参考手册,在程序中可灵活使用它的这些属性,模板部分我就使用过index属性,大家可以回过头去看看。
同样,{section}也可以配合使用{sectionelse},用来表示传入的数组变量为空时对模板进行的处理。

8、我们把上边的那个例子使用{section}来替代{foreach}来实现现样的功能,注意,在这个例子中我只将tpl模板中的{foreach}用{section}来实现,php程序文件中没有任何改动,同时加了{sectionelse}处理块:
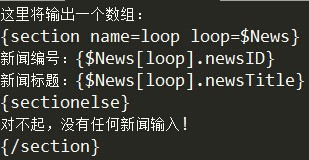
example.tpl模板文件如下:
这里将输出一个数组:
{section name=loop loop=$News} 新闻编号:{$News[loop].newsID} 新闻标题:{$News[loop].newsTitle} {sectionelse} 对不起,没有任何新闻输入! {/section}
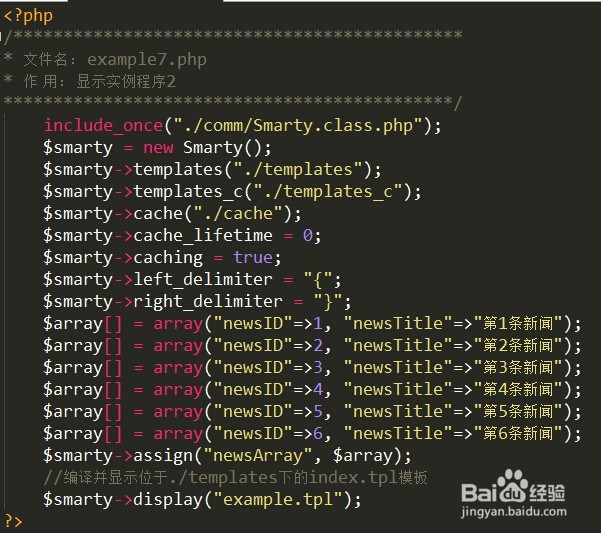
9、example.php文件如下:
<?php/*********************************************
* 文件名: example7.php
* 作 用: 显示实例程序2
*********************************************/
include_once("./comm/Smarty.class.php");
$smarty = new Smarty();
$smarty->templates("./templates");
$smarty->templates_c("./templates_c");
$smarty->cache("./cache");
$smarty->cache_lifetime = 0;
$smarty->caching = true;
$smarty->left_delimiter = "{";
$smarty->right_delimiter = "}";
$array[] = array("newsID"=>1, "newsTitle"=>"第1条新闻");
$array[] = array("newsID"=>2, "newsTitle"=>"第2条新闻");
$array[] = array("newsID"=>3, "newsTitle"=>"第3条新闻");
$array[] = array("newsID"=>4, "newsTitle"=>"第4条新闻");
$array[] = array("newsID"=>5, "newsTitle"=>"第5条新闻");
$array[] = array("newsID"=>6, "newsTitle"=>"第6条新闻");
$smarty->assign("newsArray", $array);
//编译并显示位于./templates下的index.tpl模板
$smarty->display("example.tpl");
?>
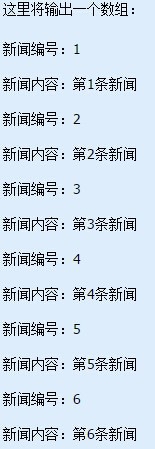
10、example.php 输出文件如下:
这里将输出一个数组:
新闻编号:1
新闻内容:第1条新闻
新闻编号:2
新闻内容:第2条新闻
新闻编号:3
新闻内容:第3条新闻
新闻编号:4
新闻内容:第4条新闻
新闻编号:5
新闻内容:第5条新闻
新闻编号:6
新闻内容:第6条新闻
这里的{section}块的对于变量的命名方式感觉有些别扭,不过没关系,你只要记住模板变量使用:
$loopName[name].var这种模式就行了,loopName为loop处赋予的变量名,[name]为name处赋予的字符串,.后为为你要在程序数组中设定要与值相对应的下标名称就行了。
好了,本文关于smarty程序设计学习指南就写到这里,对于一般的应用,这些知识已经够用了,其它的一些高级技巧大家请参看手册中的例子,此外相关的还有Smarty在实际应用中的例子,以php内置的mysql语句,phplib中的DB类,ADODB,Pear中DB类等等。感兴趣的朋友可以关注一下相关内容。
希望本文所述对大家的PHP程序设计有所帮助。