如何在myeclipse中搭建ssm框架
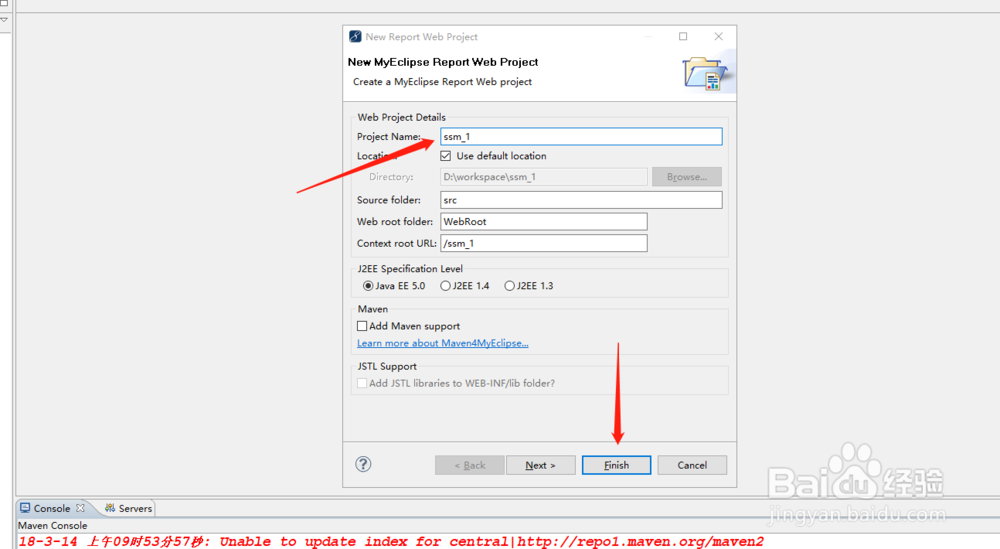
1、首先呢 打开eclipse点击左上角的File-->New-->Report Web Project

2、然后在弹出的窗口输入项目名称 点击Finish
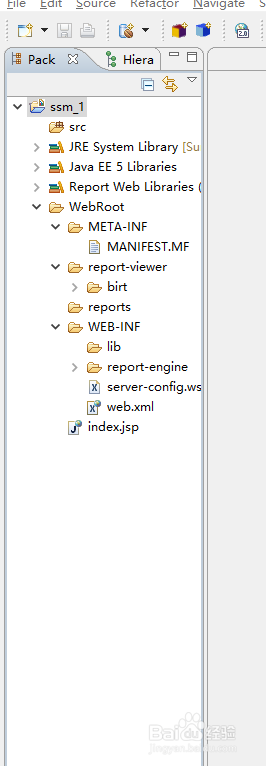
3、项目结构
4、接下来呢我们直接生成Spring 在项目上右击 选择 Myeclipse-->Add Spring Cababilities 之后会弹出窗口(如图) 然后勾选JDBC(它会自动勾选三个)之后再勾选一个web3.0,再点击finish


5、现在的项目结构

6、之后我们再配置web.xml:
<?xml version="1.0" encoding="UTF-8"?><web-app version="2.5" xmlns="http://java.sun.com/xml/ns/javaee" xmlns:xsi="http://www.w3.org/2001/XMLSchema-instance" xsi:schemaLocation="http://java.sun.com/xml/ns/javaee http://java.sun.com/xml/ns/javaee/web-app_2_5.xsd"> <welcome-file-list> <welcome-file>index.jsp</welcome-file> </welcome-file-list> <filter> <filter-name>encoding</filter-name> <filter-class>org.springframework.web.filter.CharacterEncodingFilter</filter-class> <init-param> <param-name>encoding</param-name> <param-value>UTF-8</param-value> </init-param> </filter> <filter-mapping> <filter-name>encoding</filter-name> <url-pattern>/*</url-pattern> </filter-mapping><!-- springmvc的核心控制器 --> <servlet> <servlet-name>springDispatcher</servlet-name> <servlet-class>org.springframework.web.servlet.DispatcherServlet</servlet-class> <init-param> <param-name>contextConfigLocation</param-name> <param-value>classpath:applicationContext.xml</param-value> </init-param> <load-on-startup>0</load-on-startup> </servlet> <servlet-mapping> <servlet-name>springDispatcher</servlet-name> <url-pattern>*.do</url-pattern> </servlet-mapping> <!-- 启动spring --> <listener> <listener-class>org.springframework.web.context.ContextLoaderListener</listener-class> </listener><!--拿到配置文件 --> <context-param> <param-name>contextConfigLocation</param-name> <param-value>classpath:applicationContext.xml</param-value> </context-param> </web-app>
7、然后是applicationContext.xml:
<?xml version="1.0" encoding="UTF-8"?> <beans xmlns="http://www.springframework.org/schema/beans" xmlns:xsi="http://www.w3.org/2001/XMLSchema-instance" xmlns:mvc="http://www.springframework.org/schema/mvc" xmlns:context="http://www.springframework.org/schema/context" xmlns:tx="http://www.springframework.org/schema/tx" xmlns:aop="http://www.springframework.org/schema/aop" xsi:schemaLocation="http://www.springframework.org/schema/beans http://www.springframework.org/schema/beans/spring-beans.xsd http://www.springframework.org/schema/context http://www.springframework.org/schema/context/spring-context-3.0.xsd http://www.springframework.org/schema/tx http://www.springframework.org/schema/tx/spring-tx-3.0.xsd http://www.springframework.org/schema/aop http://www.springframework.org/schema/aop/spring-aop-3.0.xsd http://www.springframework.org/schema/mvc http://www.springframework.org/schema/mvc/spring-mvc-3.0.xsd"> <!-- 开启注解 --> <context:annotation-config/> <!-- 扫描包设置 --> <context:component-scan base-package="com.tbdz.*"/> <!-- 启用3.0新注解 --> <mvc:annotation-driven /> <!-- 启动Spring MVC的注解功能,完成请求和注解POJO的映射 --> <bean class="org.springframework.web.servlet.mvc.annotation.AnnotationMethodHandlerAdapter"/> <!-- 配置数据源 --> <context:property-placeholder location="classpath:jdbc.properties"/> <bean id="dataSource" class="org.apache.commons.dbcp.BasicDataSource"> <property name="username" value="${jdbc.user}"></property> <property name="password" value="${jdbc.password}"></property> <property name="driverClassName" value="${jdbc.driverClass}"></property> <property name="url" value="${jdbc.url}"></property> <property name="maxActive" value="100" ></property> <property name="maxIdle" value="30" ></property> <property name="maxWait" value="10000" ></property> </bean> <bean id="sqlSessionFactory" class="org.mybatis.spring.SqlSessionFactoryBean"> <property name="dataSource" ref="dataSource"/> <property name="configLocation" value="classpath:mybatis-config.xml"/> </bean> <bean id="txManager" class="org.springframework.jdbc.datasource.DataSourceTransactionManager"> <property name="dataSource" ref="dataSource"></property> </bean> <aop:config> <aop:pointcut id="bussinessService" expression="execution(public * com.tbdz.service.*.*(..))"/> <aop:advisor pointcut-ref="bussinessService" advice-ref="txAdvice" /> </aop:config> <tx:advice id="txAdvice" transaction-manager="txManager"> <tx:attributes> <tx:method name="add*" propagation="REQUIRED"/> <tx:method name="update*" propagation="REQUIRED" /> <tx:method name="insert*" propagation="REQUIRED" /> <tx:method name="del*" propagation="REQUIRED" /> <tx:method name="edit*" propagation="REQUIRED" /> <tx:method name="*" propagation="REQUIRED" /> </tx:attributes> </tx:advice> <context:component-scan base-package="com.tbdz.*"/></beans>
8、到这里就基本完事啦 然后再改下你自己的包名 ;再配置下映射文件就ok