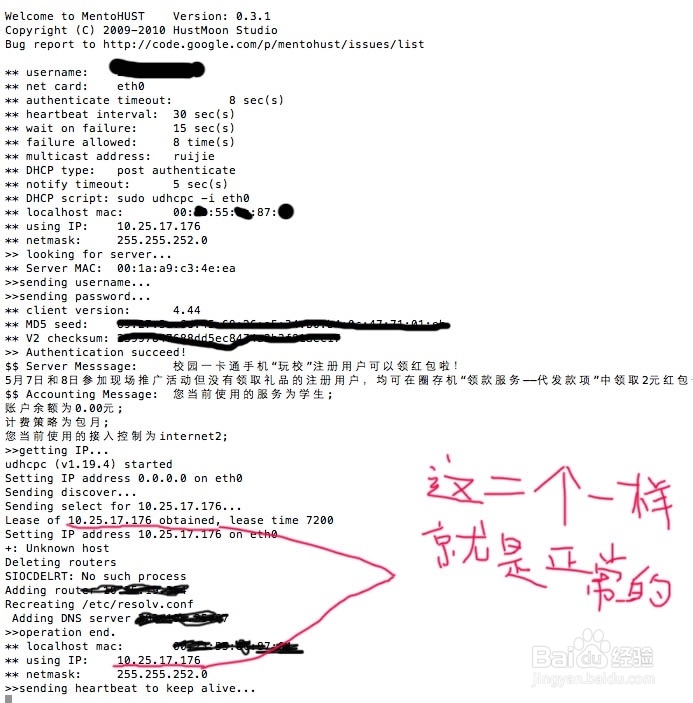
mentohust在Linux下无法获取ip的解决办法
1、首先确认mentohust可以正常认证,网络上教程很多,这里不在多作说明,认证成功但ip地址未发生变化,并且不能上网,接着往下看。
2、由于我在很多个linux系统下,在mentohust认证时用dhclient获取ip都不正常,需要断开下网络连接,或者sudo dhclient -r && sudo dhclient eth0才能正常上网,而且每次获取的ip都不一样。照道理dhcp服务器分过来的ip是同一个和mac是对应的。所以这里弃用dhclient采用udhcpc这个微型dhcp客户端。
3、debian类的linux用sudo apt-get install udhcpc 来安装udhcpc软件包,用yum管理软件的linux用sudo yum apt-get install udhcpc来安装,如果在软件源里找不到udhcpc也不要紧,直接跳到第6步(利用busybox里的udhcpc获取ip)。
4、安装完udhcpc后在终端里输入sudo udhcpc,出现udhcpc (v x.xx.x) started就是安装好了,在终端里输入sudo nano /etc/mentohust.conf以编辑mentohust的配置文件,把"DhcpScript="后面的"dhclient"改成"sudo udhcpc -i eth0"。(eth0根据你自己上网的网卡名称做改变)按ctrl+o保存,ctrl+x退出。
5、在终端里输入sudo mentohust 测试udhcpc是否正常工作,测试认证成功后是否正常联网,在终端里输入ifconfig,看认证上网的网卡(一般是eth0)与刚才udhcpc的获取到的ip是否一致,如果都正常的话教程就结束了,把sudo mentohust -b1 这条命令加入到rc.local就可以实现开机自启动,不正常请跳到第8步

6、如果你所使用的linux的软件仓库里找不到udhcpc,那么我们使用busybox来启动udhcpc,首先安装busybox,这个软件基本上每一个发行版的linux的仓库都会有,使用命令安装sudo apt-get install busybox或者sudo yum install busybox,安装完以后使用sudo busybox 来测试是否正常安装,若出现一大串命令就是成功了。
7、终端里输入sudo ln -s /sbin/busybox /sbin/udhcpc建立软链接,完成后跳回到第4步,执行完第4步记得跳回来~
8、在终端输入sudo nano /usr/share/udhcpc/default.script建立这个文件,(若系统没有nano这个工具用vi代替)粘贴下列代码:
#!/bin/sh
# udhcpc script edited by Tim Riker <Tim@Rikers.org>
RESOLV_CONF="/etc/resolv.conf"
[ -n "$1" ] || { echo "Error: should be called from udhcpc"; exit 1; }
NETMASK=""
[ -n "$subnet" ] && NETMASK="netmask $subnet"
BROADCAST="broadcast +"
[ -n "$broadcast" ] && BROADCAST="broadcast $broadcast"
case "$1" in
deconfig)
echo "Setting IP address 0.0.0.0 on $interface"
ifconfig $interface 0.0.0.0
;;
renew|bound)
echo "Setting IP address $ip on $interface"
ifconfig $interface $ip $NETMASK $BROADCAST
if [ -n "$router" ] ; then
echo "Deleting routers"
while route del default gw 0.0.0.0 dev $interface ; do
:
done
metric=0
for i in $router ; do
echo "Adding router $i"
route add default gw $i dev $interface metric $metric
: $(( metric += 1 ))
done
fi
echo "Recreating $RESOLV_CONF"
# If the file is a symlink somewhere (like /etc/resolv.conf
# pointing to /run/resolv.conf), make sure things work.
realconf=$(readlink -f "$RESOLV_CONF" 2>/dev/null || echo "$RESOLV_CONF")
tmpfile="$realconf-$$"
> "$tmpfile"
[ -n "$domain" ] && echo "search $domain" >> "$tmpfile"
for i in $dns ; do
echo " Adding DNS server $i"
echo "nameserver $i" >> "$tmpfile"
done
mv "$tmpfile" "$realconf"
;;
esac
exit 0
按ctrl+o保存,ctrl+x退出
9、给以刚才那个脚本可执行的权限sudo chmod +x /usr/share/udhcpc/default.script
好了跳到第5步