mysql集群搭建及测试
1、一、安装
1、每个节点做相同的操作
tar xzf mysql-cluster-gpl-7.2.8-linux2.6-i686.tar.gz
mv mysql-cluster-gpl-7.2.8-linux2.6-i686 /usr/local/mysql
2、SQL节点安装
groupadd mysql
useradd -g mysql mysql
chown -R root /usr/local/mysql
chown -R mysql /usr/local/mysql/data
chgrp -R mysql /usr/local/mysql
/usr/local/mysql/scripts/mysql_install_db --basedir=/usr/local/mysql --datadir=/usr/local/mysql/data --user=mysql
cp /usr/local/mysql/support-files/my-medium.cnf /etc/my.cnf
开机启动:
cp support-files/mysql.server /etc/rc.d/init.d/
chmod +x /etc/rc.d/init.d/mysql.server
chkconfig --add mysql.server
3、存储节点 cp bin/ndbd /usr/local/bin/
cp bin/ndbmtd /usr/local/bin/
chmod +x /usr/local/bin/*
4、管理节点
cp /usr/local/mysql/bin/ndb_mgm* /usr/local/bin/
chmod + /usr/local/bin/*
二、节点配置
1、配置存储节点和SQL(API)节点
[mysqld]
ndbcluster
ndb-connectstring=mongo2 #enable the NDB storage engine
[mysql_cluster] ndb-connectstring=mongo2
2、配置管理节点
[ndbd default] NoOfReplicas=2 # Number of replicas DataMemory=80M # How much memory to allocate for data storage IndexMemory=18M # How much memory to allocate for index storage # For DataMemory and IndexMemory, we have used the # default values. Since the "world" database takes up # only about 500KB, this should be more than enough for # this example Cluster setup. # TCP/IP options: [tcp default] portnumber=2202 # This the default; however, you can use any # port that is free for all the hosts in cluster # Note: It is recommended beginning with MySQL 5.0 that # you do not specify the portnumber at all and simply allow # the default value to be used instead # Management process options: [ndb_mgmd] hostname=mongo2 # Hostname or IP address of MGM node datadir=/var/lib/mysql-cluster # Directory for MGM node logfiles # Options for data node "A": [ndbd] # (one [NDBD] section per data node) hostname=mongo1 # Hostname or IP address datadir=/usr/local/mysql/data # Directory for this data node's datafiles # Options for data node "B": [ndbd] hostname=ndbd.com # Hostname or IP address datadir=/usr/local/mysql/data # Directory for this data node's datafiles # SQL node options: [mysqld] hostname=sqld.com # Hostname or IP address # (additional mysqld connections can be # specified for this node for various # purposes such as running ndb_restore)
三、首次启动节点
1、启动管理节点
/usr/local/mysql/bin/ndb_mgmd --configdir=/var/lib/mysql-cluster -f /var/lib/mysql-cluster/config.ini
2、启动数据节点
/usr/local/mysql/bin/ndbd --initial (成功后出现以下提示)

2、 3、启动SQL节点
/usr/local/mysql/bin/mysqld_safe &
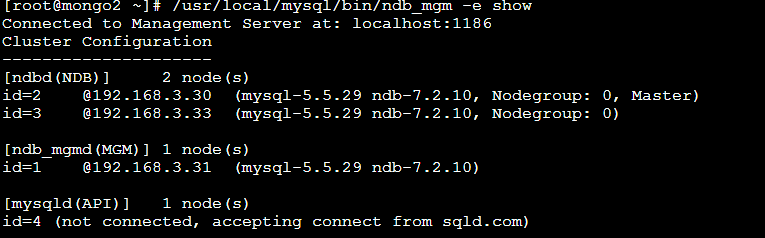
4、检查状态
/usr/local/mysql/bin/ndb_mgm -e show
如图:
3、四、测试服务是否正常
在SQL节点上执行如下数据库操作:
报错:Could not connect to storage engine ,sql节点没有连接到管理节点。
/usr/local/mysql/bin/mysql -uroot -p
mysql> create database clusterdb;use clusterdb;
mysql> create table simples (id int not null primary key) engine=ndb;
mysql> insert into simples values (1),(2),(3),(4);
mysql> select * from simples;
如果出现如图则表示工作正常。

4、五、安全关闭和重启
1、关闭mysql集群,可在管理节点在执行如下命令:
/usr/local/mysql/bin/ndb_mgm -e shutdown
所有节点将关闭,sql节点需要重新关闭再启动。
3 stop -f
2、重启管理节点
/usr/local/mysql/bin/ndb_mgmd --configdir=/var/lib/mysql-cluster -f /var/lib/mysql-cluster/config.ini
3、重启数据节点
/usr/local/mysql/bin/ndbd

5、测试:
架构:1api 1mgm 2ndbd
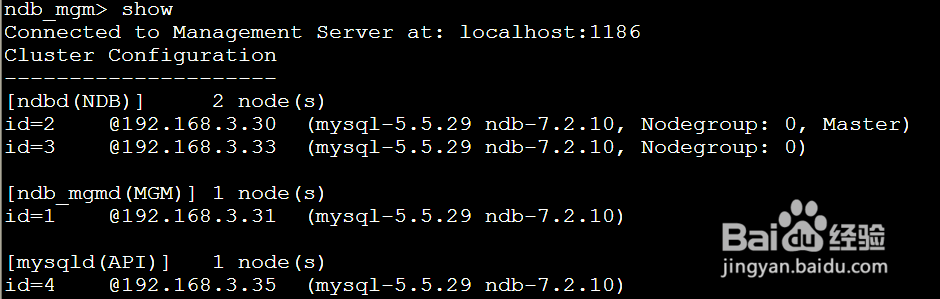
mgm端:./ndb_mgm
ndb_mgm>show #查看集群状态
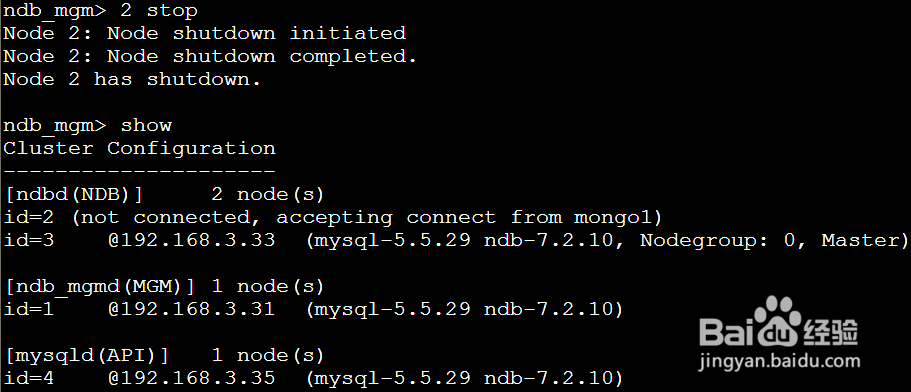
6、ndb_mgm>2 stop #停止数据节点的其中master节点,备份节点自动顶替成主节点。