怎么用ps抠签名Photoshop抠图手写字签名
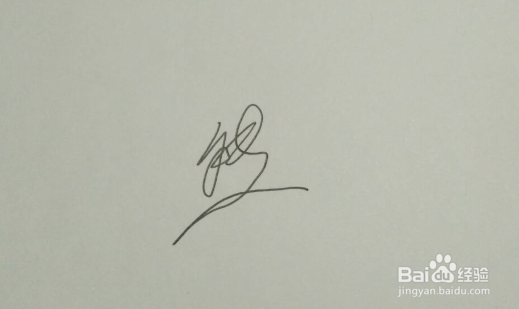
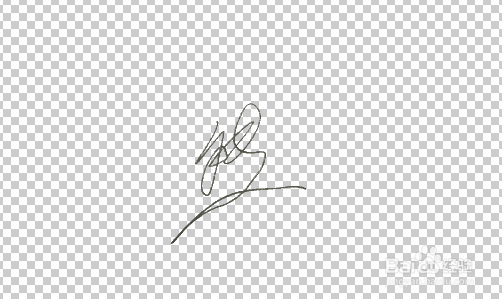
1、以抠这张图为例
2、打开PS,点击“文件”里的“打开”。
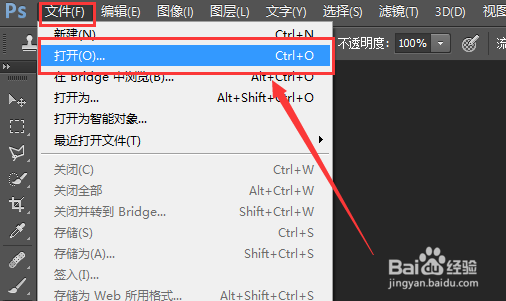
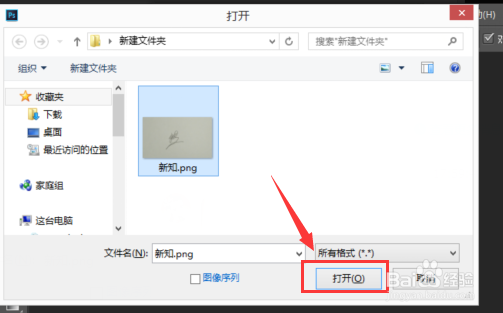
3、选择需要抠图的文件,点击“打开”。
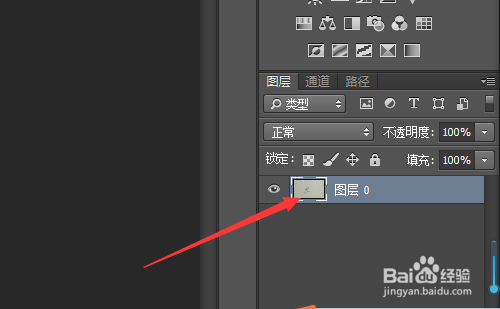
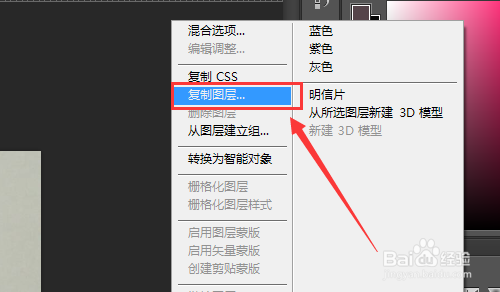
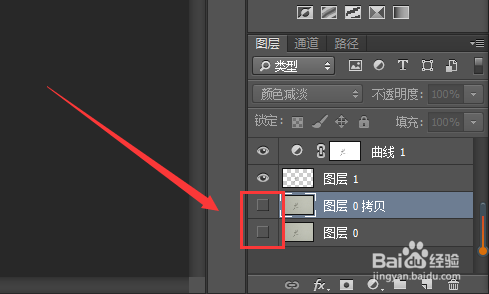
4、右键点击新加的图层。
5、选择“复制图层”。
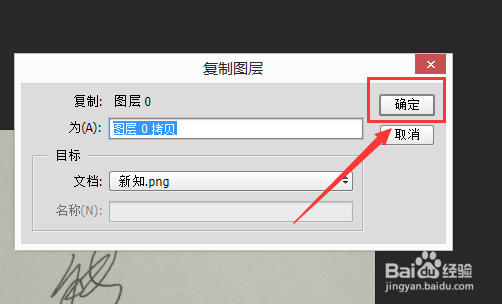
6、弹出窗口点击“确定”。
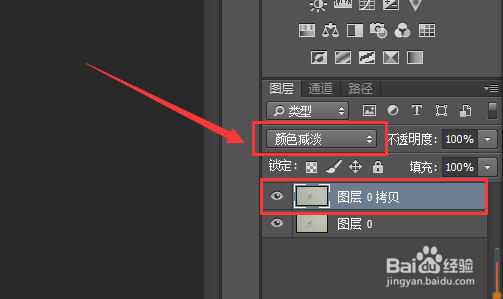
7、点击拷贝的图层,将设置图层的混合模式选择为“颜色减淡”。
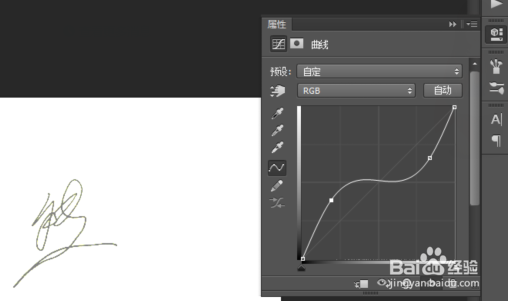
8、点击右下角的创建选择“曲线”。
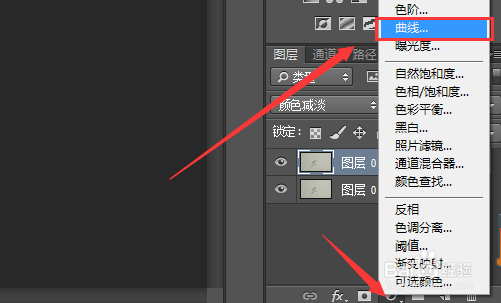
9、提亮高光,压低暗部。
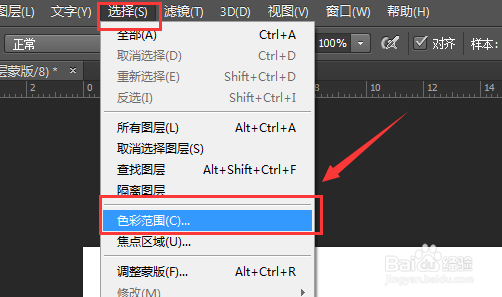
10、选择拷贝图层,然后点击上方工具栏的“选择”里的“色彩范围”
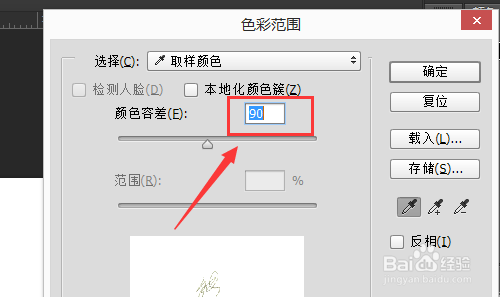
11、颜色容差写为“90”,然后取白色,点击确定。
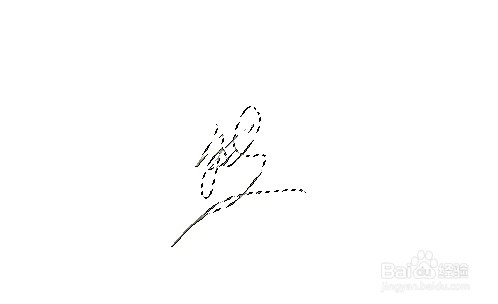
12、按“ctrl+shift+I”反选区域,按“ctrl+J”把图扣出来。
13、将图层0与拷贝图层旁边的眼睛点掉,取消显示。
14、这样签名就单独扣好了。
声明:本网站引用、摘录或转载内容仅供网站访问者交流或参考,不代表本站立场,如存在版权或非法内容,请联系站长删除,联系邮箱:site.kefu@qq.com。
阅读量:84
阅读量:27
阅读量:96
阅读量:150
阅读量:66