Unity NavMeshAgent教程之画出自动寻路路径渲染
1、打开Unity,设置简单布局寻路场景,并设置为静态,具体如下图

2、在菜单“Window”-“Navigtion”的面板上“Bake”场景,具体如下图

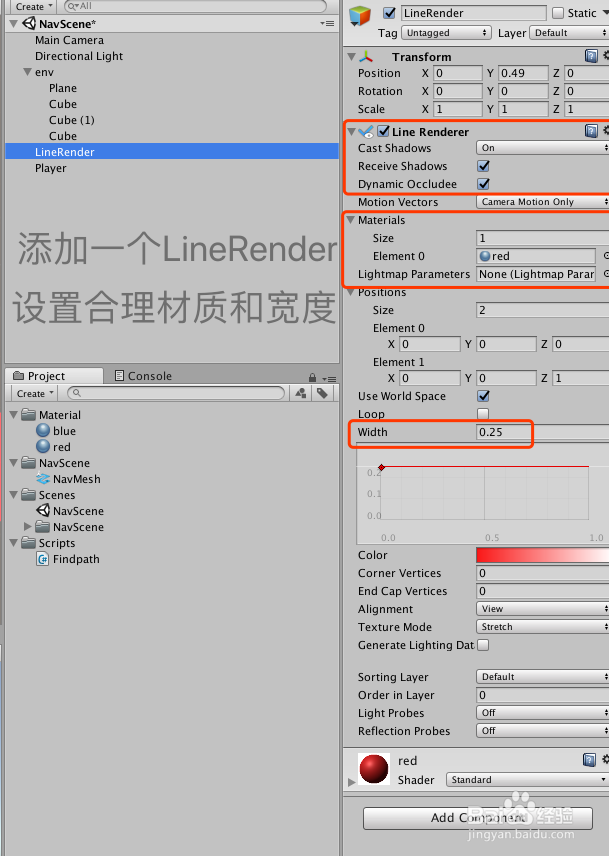
3、在场景新建一个空物体,并且命名为“LineRender”,并添加组件“LineRenderer”,并添加材质和设置合适宽度,具体如下图
4、在场景中添加“Capsule”,并且命名为“Player”,添加一个“NavMeshAgent”和脚本“FindPath”,具体如下图

5、“FindPath”脚本的具体代码和代码说明如下图

6、“FindPath”脚本的代码内容如下:
using System.Collections;
using System.Collections.Generic;
using UnityEngine;
using UnityEngine.AI;
public class Findpath : MonoBehaviour {
private NavMeshAgent _navPlayer;
private NavMeshPath _navPath;
public LineRenderer lineGameObject;
// Use this for initialization
void Start () {
_navPlayer = transform.GetComponent<NavMeshAgent>();
_navPath = new NavMeshPath();
} // Update is called once per frame
void Update () {
if(Input.GetMouseButtonDown(0)) {
Ray ray = Camera.main.ScreenPointToRay(Input.mousePosition);
RaycastHit hit;
if(Physics.Raycast(ray,out hit,Mathf.Infinity)) {
_navPlayer.SetDestination(hit.point);
_navPlayer.CalculatePath(hit.point, _navPath);
if (_navPath.corners.Length < 2)
return;
else {
lineGameObject.positionCount = _navPath.corners.Length;
Vector3 []tmpCorners = _navPath.corners;
for(int i = 0; i < tmpCorners.Length; i ++) {
tmpCorners[i].y += 1.0f;
}
lineGameObject.SetPositions(tmpCorners);
}
}
}
}
}
7、脚本编译正确,回到unity界面,运行场景,随机点击场景之的点,自动导航,并且,进行了路径渲染,具体如下图

8、到此,《Unity NavMeshAgent教程之画出自动寻路路径渲染》讲解结束,谢谢