Java 设置PPT项目编号/符号列表
1、方法1:从官网(https://www.e-iceblue.cn/Downloads/Spire-Presentation-JAVA.html)下载,获取控件包。
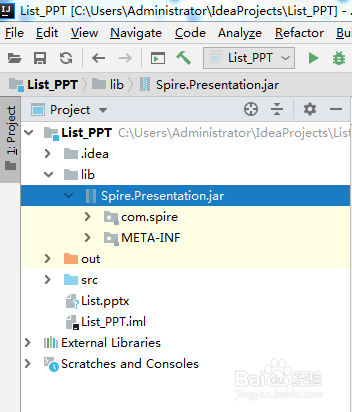
步骤:在程序下新建一个directory目录,并命名(本示例中命名为lib);将控件包lib文件夹下的jar(如下图1)复制到程序中新建的目录下。复制jar文件后,鼠标右键点击jar文件,选择”Add as Library”。完成导入(如下图2)。

2、方法2:通过maven导入。参考导入方法(https://www.e-iceblue.cn/licensing/install-spirepdf-for-java-from-maven-repository.html )。
1、import com.spire.presentation.*;
import com.spire.presentation.drawing.FillFormatType;
import java.awt.*;
import java.awt.geom.Rectangle2D;
public class List_PPT {
public static void main(String[] args) throws Exception{
//创建Presentation实例
Presentation ppt = new Presentation();
//获取第一张幻灯片
ISlide slide = ppt.getSlides().get(0);
//添加一个形状到幻灯片
Rectangle2D rect1 = new Rectangle2D.Double(100, 70, 300, 200);
IAutoShape shape = slide.getShapes().appendShape(ShapeType.RECTANGLE, rect1);
shape.getShapeStyle().getLineColor().setColor(Color.white);
shape.getFill().setFillType(FillFormatType.NONE);
//移除形状中的默认段落
shape.getTextFrame().getParagraphs().clear();
//声明数组内容
String[] str1 = new String[] {"香蕉", "苹果", "牛奶"};
String[] str2 = new String[] {"樱花", "梨花", "兰花"};
//写入数组内容1到段落并设置列表格式为编号列表
for(int i = 0; i < str1.length; i ++)
{
ParagraphEx paragraph1 = new ParagraphEx();
paragraph1.setText(str1[i]);
paragraph1.getTextRanges().get(0).getFill().setFillType(FillFormatType.SOLID);
paragraph1.getTextRanges().get(0).getFill().getSolidColor().setColor(Color.blue);
paragraph1.setBulletType(TextBulletType.NUMBERED);
paragraph1.setBulletStyle(NumberedBulletStyle.BULLET_ARABIC_DB_PLAIN);
shape.getTextFrame().getParagraphs().append(paragraph1);
}
//写入数组内容2到段落并设置列表格式为符号列表
for(int j = 0; j < str2.length; j ++)
{
ParagraphEx paragraph2 = new ParagraphEx();
paragraph2.setText(str2[j]);
paragraph2.getTextRanges().get(0).getFill().setFillType(FillFormatType.SOLID);
paragraph2.getTextRanges().get(0).getFill().getSolidColor().setColor(Color.pink);
paragraph2.setBulletType(TextBulletType.SYMBOL);
shape.getTextFrame().getParagraphs().append(paragraph2);
}
//保存文档
ppt.saveToFile("List.pptx", FileFormat.PPTX_2013);
}
}
2、设置效果:
