java获取windowscpu使用率方法
1、第一步:判断系统,linux,windons,mac等等系统使用命令和方法都不一样。代码如下:
// 操作系统
String osName = System.getProperty("os.name");

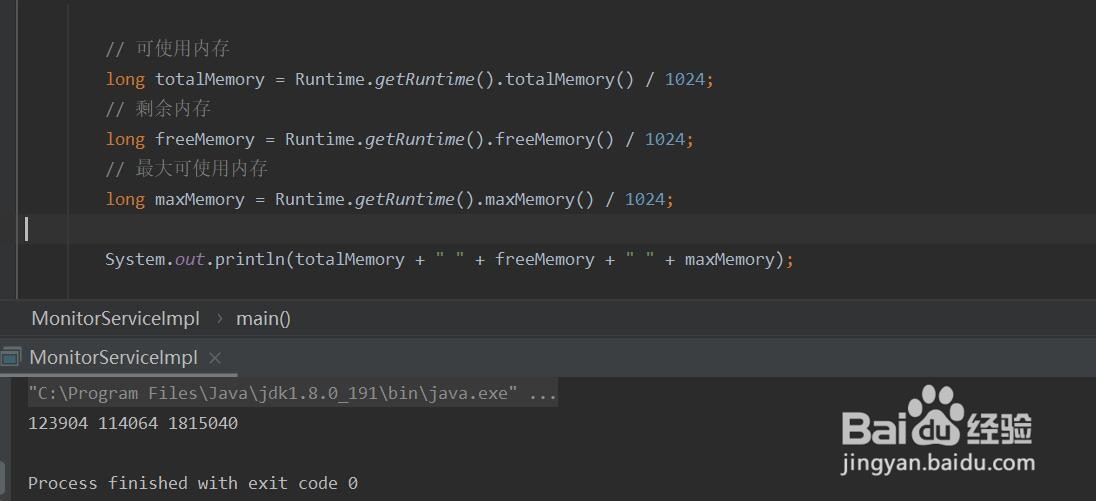
2、第二步:获取系统内存信息,代码如下:
// 可使用内存
long totalMemory = Runtime.getRuntime().totalMemory() / kb;
// 剩余内存
long freeMemory = Runtime.getRuntime().freeMemory() / kb;
// 最大可使用内存
long maxMemory = Runtime.getRuntime().maxMemory() / kb;
3、第三步:获取cpu信息,命令和代码如下:
String procCmd = System.getenv("windir")
+ "//system32//wbem//wmic.exe process get Caption,CommandLine,"
+ "KernelModeTime,ReadOperationCount,ThreadCount,UserModeTime,WriteOperationCount";
// 取进程信息
long[] c0 = readCpu(Runtime.getRuntime().exec(procCmd));

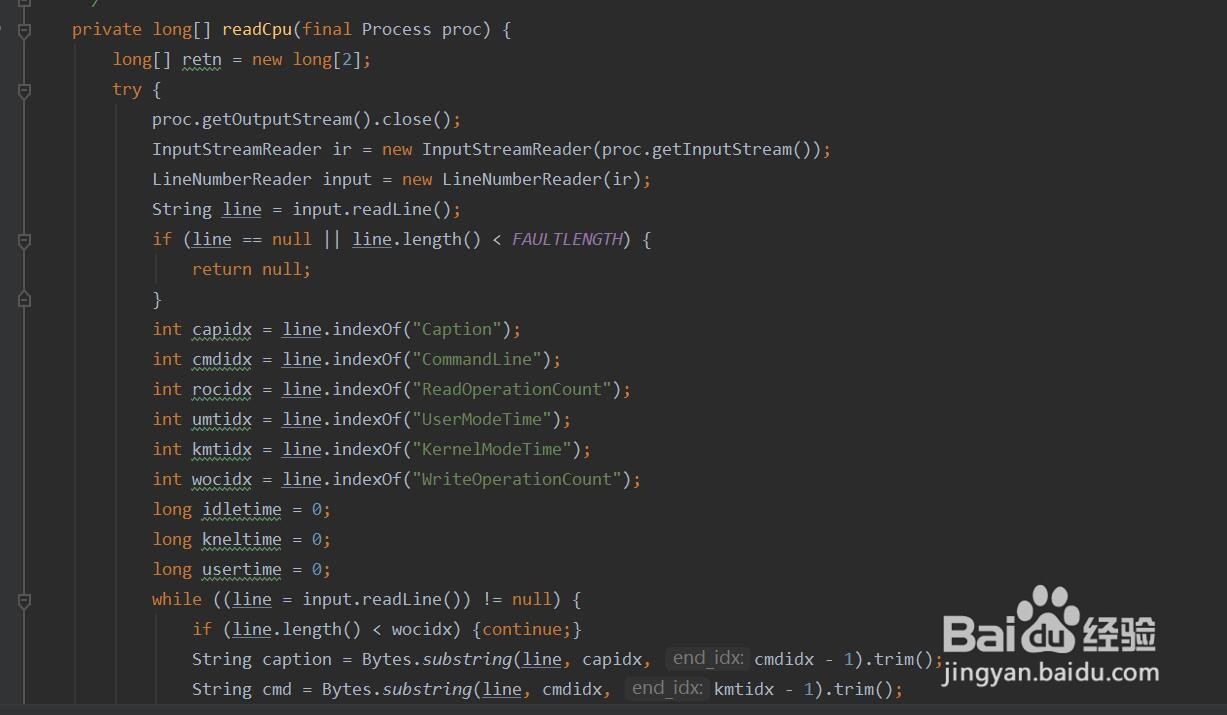
4、第四步:readCpu方法代码如下:
private long[] readCpu(final Process proc) {
long[] retn = new long[2];
try {
proc.getOutputStream().close();
InputStreamReader ir = new InputStreamReader(proc.getInputStream());
LineNumberReader input = new LineNumberReader(ir);
String line = input.readLine();
if (line == null || line.length() < FAULTLENGTH) {
return null;
}
int capidx = line.indexOf("Caption");
int cmdidx = line.indexOf("CommandLine");
int rocidx = line.indexOf("ReadOperationCount");
int umtidx = line.indexOf("UserModeTime");
int kmtidx = line.indexOf("KernelModeTime");
int wocidx = line.indexOf("WriteOperationCount");
long idletime = 0;
long kneltime = 0;
long usertime = 0;
while ((line = input.readLine()) != null) {
if (line.length() < wocidx) {continue;}
String caption = Bytes.substring(line, capidx, cmdidx - 1).trim();
String cmd = Bytes.substring(line, cmdidx, kmtidx - 1).trim();
if (cmd.indexOf("wmic.exe") >= 0) { continue;}
if (caption.equals("System Idle Process") || caption.equals("System")) {
idletime += Long.valueOf( Bytes.substring(line, kmtidx, rocidx - 1).trim()).longValue();
idletime += Long.valueOf(Bytes.substring(line, umtidx, wocidx - 1).trim()).longValue();
continue;
}
kneltime += Long.valueOf(Bytes.substring(line, kmtidx, rocidx - 1).trim()).longValue();
usertime += Long.valueOf(Bytes.substring(line, umtidx, wocidx - 1).trim()).longValue();
}
retn[0] = idletime;
retn[1] = kneltime + usertime;
return retn;
} catch (Exception ex) {
ex.printStackTrace();
} finally {
try {
proc.getInputStream().close();
} catch (Exception e) {
e.printStackTrace();
}
}
return null;
}
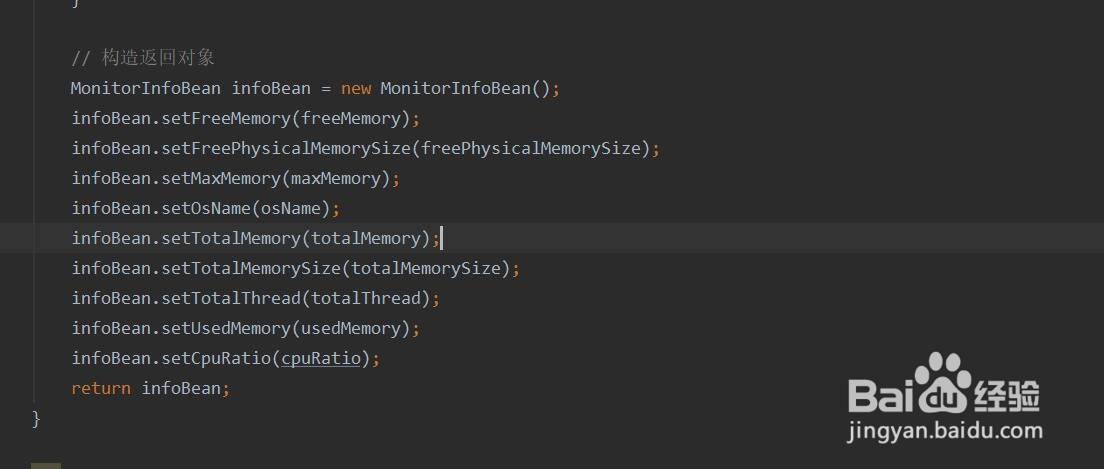
5、第五步:构造对象,对返回的结果进行封装,代码如下:
// 构造返回对象
MonitorInfoBean infoBean = new MonitorInfoBean();
infoBean.setFreeMemory(freeMemory);
infoBean.setFreePhysicalMemorySize(freePhysicalMemorySize);
infoBean.setMaxMemory(maxMemory);
infoBean.setOsName(osName);
infoBean.setTotalMemory(totalMemory);
infoBean.setTotalMemorySize(totalMemorySize);
infoBean.setTotalThread(totalThread);
infoBean.setUsedMemory(usedMemory);
infoBean.setCpuRatio(cpuRatio);
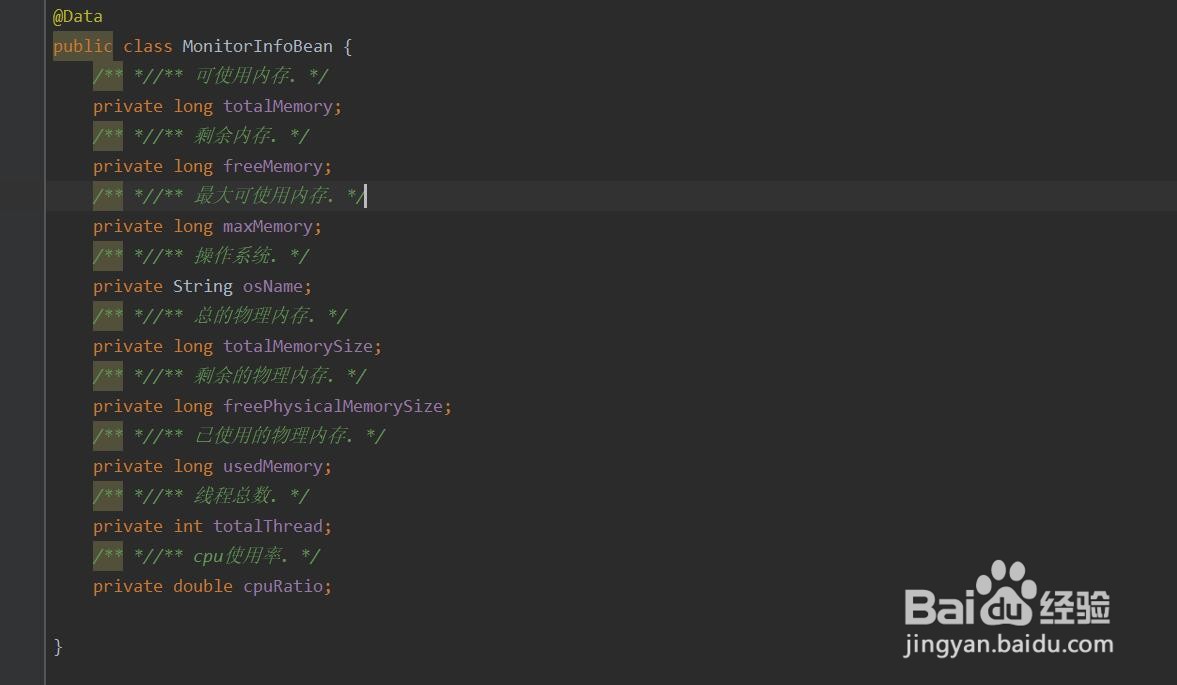
6、第六步:MonitorInfoBean 实体类代码如下:
@Data
public class MonitorInfoBean {
/** *//** 可使用内存. */
private long totalMemory;
/** *//** 剩余内存. */
private long freeMemory;
/** *//** 最大可使用内存. */
private long maxMemory;
/** *//** 操作系统. */
private String osName;
/** *//** 总的物理内存. */
private long totalMemorySize;
/** *//** 剩余的物理内存. */
private long freePhysicalMemorySize;
/** *//** 已使用的物理内存. */
private long usedMemory;
/** *//** 线程总数. */
private int totalThread;
/** *//** cpu使用率. */
private double cpuRatio;
}
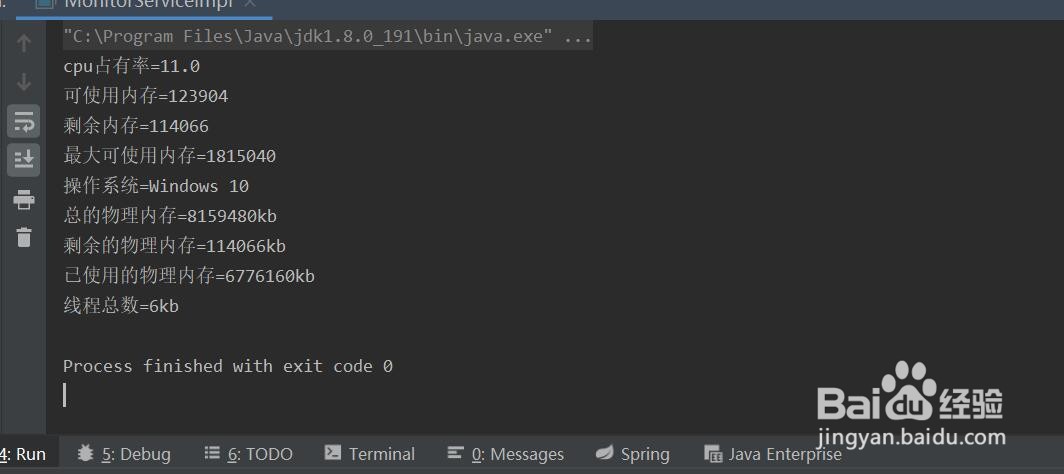
7、第七步:运行结果展示,如图:
8、第八步:此放不了网盘地址,要的留言
声明:本网站引用、摘录或转载内容仅供网站访问者交流或参考,不代表本站立场,如存在版权或非法内容,请联系站长删除,联系邮箱:site.kefu@qq.com。
阅读量:174
阅读量:113
阅读量:121
阅读量:24
阅读量:165