Linux编译安装配置Nginx服务器
1、解决依赖关系
[root@vnths50 ~]# yum groupinstall "Development Tools" "Development Libraries" -y
[root@vnths50 ~]# yum install gcc gcc-c++ autoconf automake zlib zlib-devel openssl openssl-devel pcre* -y
Zlib:Nginx提供gzip模块,需要zlib的支持
Openssl:Nginx提供SSL的功能
[root@vnths50 ~]#tar xf pcre-8.37.tar.bz2 -C /usr/local/src/
解压此安装包即可,不需要安装,Nginx需要指定pcre的源码不是安装后的路径,此包的功能是支持地址重写rewrite功能 pcre的依赖可以yum安装pcre和pcre-devel解决!
2、解压编译安装
[root@vnths50 ~]# tar xvf nginx-1.8.0.tar.gz -C /usr/local/src/
[root@vnths50 nginx-1.8.0]# ./configure --prefix=/usr/local/nginx --with-http_dav_module --with-http_stub_status_module --with-http_addition_module --with-http_sub_module --with-http_flv_module --with-http_mp4_module --with-pcre=/usr/local/src/pcre-8.37
选项解释
--with-http_dav_module
#启用支持(增加put,delete,mkcol:创建集合,copy和move方法)默认关闭
--with-http_stub_status_module
#启用支持(获取Nginx上次启动以来的工作状态)
--with-http_addition_module
#启用支持(作为一个输出过滤器,支持不完全缓冲,分部分相应请求)
--with-http_sub_module
#启用支持(允许一些其他文本替换Nginx相应中的一些文本)
--with-http_flv_module
#启用支持(提供支持flv视频文件支持)
--with-http_mp4_module
#启用支持(提供支持mp4视频文件支持,提供伪流媒体服务端支持)
--with-pcre=/usr/local/src/pcre-8.37
#需要注意,这里指的是源码,用#./configure --help |grep pcre查看帮助
3、创建nginx用户
[root@vnths50 ~]# useradd -M -u 8001 -s /sbin/nologin nginx
查看nginx目录结构
[root@vnths50 ~]# ll /usr/local/nginx/
total 16
drwxr-xr-x 2 root root 4096 Sep 1 06:06 conf
drwxr-xr-x 2 root root 4096 Sep 1 04:55 html
drwxr-xr-x 2 root root 4096 Sep 1 04:55 logs
drwxr-xr-x 2 root root 4096 Sep 1 04:55 sbin
[root@vnths50 ~]#
4、配置nginx支持php文件
[root@vnths50 ~]# vim /usr/local/nginx/conf/nginx.conf
--------------------------------------------------------------------------------
#user nobody;
user nginx nginx;
worker_processes 1;
--------------------------------------------------------------------------
location ~ \.php$ {
root html;
fastcgi_pass 127.0.0.1:9000;
fastcgi_index index.php;
fastcgi_param SCRIPT_FILENAME /usr/local/nginx/html$fastcgi_script_name;
include fastcgi_params;
}
5、启动nginx
[root@vnths50 ~]# ln -n /usr/local/nginx/sbin/nginx /bin/nginx
#创建软连接
[root@vnths50 ~]# nginx #启动
[root@vnths50 ~]# netstat -tlnp | grep nginx #查看nginx是否正常启动
tcp 0 0 0.0.0.0:80 0.0.0.0:* LISTEN 7109/nginx
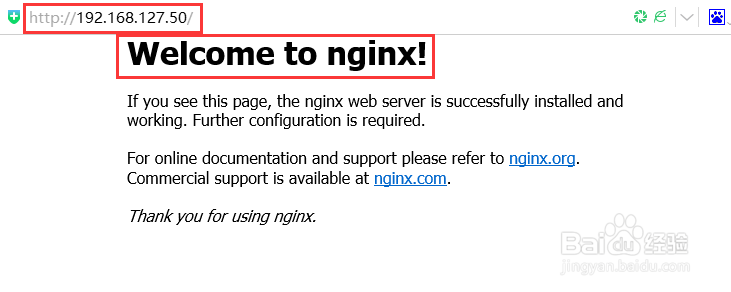
6、浏览器测试,出现一下界面说明成功。
