Nginx+uWSGI+flask搭建Python web应用
1、安装uwsgi
pip install uwsgi

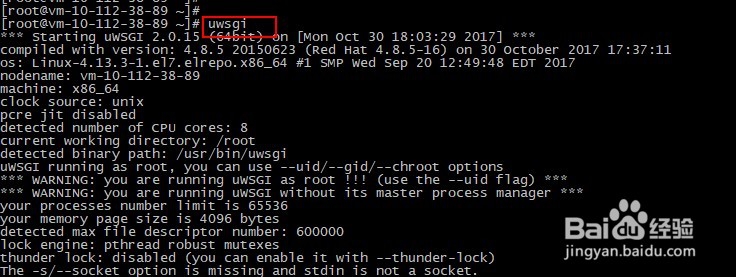
2、安装成功,执行uwsgi,出现如下毙捧信息:
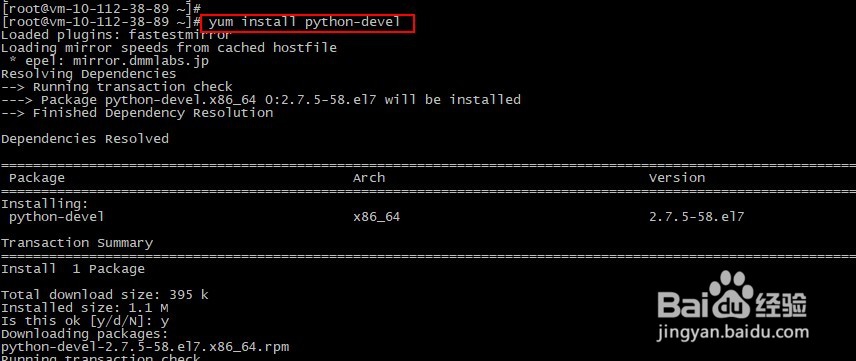
3、若安装uwsgi出现如下错误泰祝信息:

4、请执行yum install python-devel
5、创建uwsgi配置文件myapp.ini (配置文件名可自定义)
[uwsgi]
socket=/tmp/uwsgi.sock
mount=/myapp=server.py
manage-script-name=true
master=true
processes=4
threads=2
stats=127.0.0.1:9191
callable=app #将Flask应用对象取名为”app”,WSGI标准是”application”。
virtualenv=/home/bjhee/virtualenv #建议采用虚拟环境来避免应用间冲突,uWSGI可以非常容易做到这点,就是在配置文件中加上”virtualenv”项
uWSGI将启动4个应用进程,每个进程有2个线程,和一个master主进程(监控其他进程状态,如果有进程死了,则重启),
6、安装flask
pip install flask

7、运用flask
创建server.py,文件内容如下:
from flask import Flask
app = Flask(__name__)
@app.route('/')
def index():
return '<h1>Hello World</h1>'
8、在Nginx创建应用
修改nginx.conf文件
server {
listen 8000; #端口可自定义
server_name localhost;
location /myapp {
root /myapp;
include uwsgi_params;
uwsgi_param SCRIPT_NAME /myapp;
uwsgi_pass unix:/tmp/uwsgi.sock;
}
}
9、启动Nginx服务器,执行/usr/local/nginx/sbin/nginx (根据自己的服务器的安装位置)
启动uwsgi,执行uwsgi /usr/local/nginx/conf/myapp.ini(配置文件位置可以自定义)
启动uwsgi 在/tmp目录下会创建uwsgi.sock,该文件Nginx访问不了,所以需要将/tmp/uwsgi.sock 权限得改成777。
修改权限命令chmod 777 /tmp/uwsgi.sock
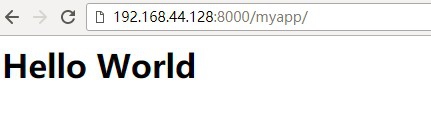
在浏览器下输入http://localhost:8000/myapp (localhost也改为趣况蚂服务的ip)
浏览器会显示 “hello world”