php+ajax实现无刷新留言板系统
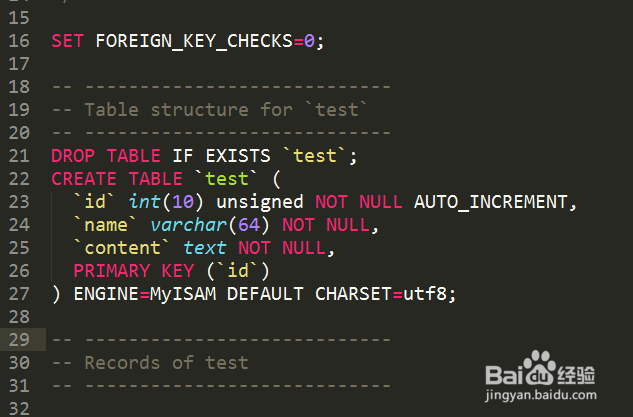
1、先创建一个名"ajaxdemo" 数据库,在创建一个test表,下面是创建表个字段的sql
SET FOREIGN_KEY_CHECKS=0;
-- ----------------------------
-- Table structure for `test`
-- ----------------------------
DROP TABLE IF EXISTS `test`;
CREATE TABLE `test` (
`id` int(10) unsigned NOT NULL AUTO_INCREMENT,
`name` varchar(64) NOT NULL,
`content` text NOT NULL,
PRIMARY KEY (`id`)
) ENGINE=MyISAM DEFAULT CHARSET=utf8;
-- ----------------------------
-- Records of test
-- ----------------------------
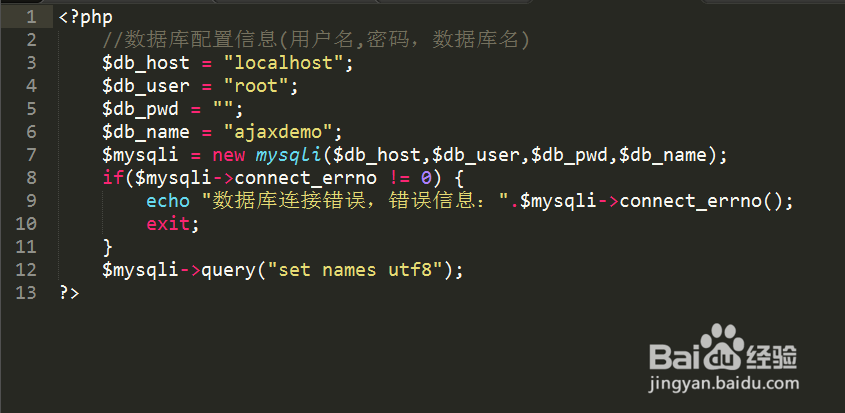
2、建一个config.php的配置文件,代码如下:
<?php
//数据库配置信息(用户名,密码,数据库名)
$db_host = "localhost";
$db_user = "root";
$db_pwd = "";
$db_name = "ajaxdemo";
$mysqli = new mysqli($db_host,$db_user,$db_pwd,$db_name);
if($mysqli->connect_errno != 0) {
echo "数据库连接错误,错误信息:".$mysqli->connect_errno();
exit;
}
$mysqli->query("set names utf8");
?>
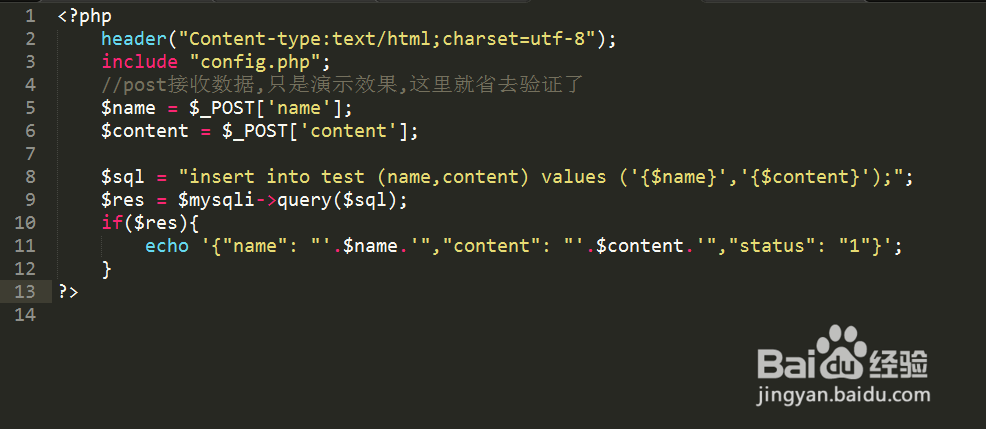
3、在创建一个add.php文件 这个是执行添加留言的文件 代码如下:
<?php
header("Content-type:text/html;charset=utf-8");
include "config.php";
//post接收数据,只是演示效果,这里就省去验证了
$name = $_POST['name'];
$content = $_POST['content'];
$sql = "insert into test (name,content) values ('{$name}','{$content}');";
$res = $mysqli->query($sql);
if($res){
echo '{"name": "'.$name.'","content": "'.$content.'","status": "1"}';
}
?>
4、在写一个index.php文件 里面的代码如下:
<!DOCTYPE html PUBLIC "-//W3C//DTD XHTML 1.0 Transitional//EN" "http://www.w3.org/TR/xhtml1/DTD/xhtml1-transitional.dtd">
<html xmlns="http://www.w3.org/1999/xhtml">
<head>
<meta http-equiv="Content-Type" content="text/html; charset=utf-8" />
<title>AJAX无刷新留言系统</title>
<style type="text/css">
body{color:#555;font-size:14px;padding:0;margin:0;}
#form { background:#dedede; padding:10px 20px; width:700px; margin: 10px auto; border:1px solid #333;}
#show{ background:#f6f6f6;padding:10px 20px; width:700px; margin: 10px auto; border:1px solid #333;}
#show p{ margin:6px; font-size:13px; line-height:22px; border-bottom:1px dashed #cdcdcd;}
#form input,textarea{width: 100%;}
lable {margin: 10px}
</style>
<script type="text/javascript" src="jquery-1.7.2.min.js"></script>
<script type="text/javascript">
$(function(){
$("#sub").click(function(){
//只是说明原理,然后这里省去了验证文本框内容的步骤,直接发送ajax请求
$.post("add.php",{name : $("#name").val(), content : $("#content").val()}, function(data){
if(data.status){
var str = "<strong>"+data.name+"</strong> 发表了:"+data.content+"";
$("#show").prepend(str); //在前面追加
}else{
alert("评论失败");
}
}, 'json');
});
});
</script>
</head>
<body>
<div id="form">
<table width="100%" cellpadding="10">
<tr>
<td width="60"><lable>用户名:</lable></td>
<td><input type="text" name="name" id="name" /></td>
</tr>
<tr>
<td width="60"><lable>内 容:</lable></td>
<td><lable></lable><textarea name="content" id="content"></textarea></td>
</tr>
<tr>
<td colspan="2"><center><button id="sub">发布</button></center></td>
</tr>
</table>
</div>
<div id="show">
<?php
include 'config.php';
$sql = 'select * from test;';
$res = $mysqli->query($sql);
while ($row = $res->fetch_array()) {
echo "<strong>".$row['name']."</strong>发表了:".$row['content']."";
}
?>
</div>
</body>
</html>
5、完整的源代码和数据库表结构下载地址:链接: https://pan.baidu.com/s/1nuM3IOh 密码: fsf4